Configuring SAML SSO for ManageEngine ServiceDesk Plus (On-premises)
The following steps will help you configure the single sign-on functionality between ADSelfService Plus and ServiceDesk Plus.
Prerequisite
- Ensure that the ADSelfService Plus server can be accessed through HTTPS Connection (Access URL must be configured as HTTPS).
- Log in to ADSelfService Plus as an administrator.
- Navigate to Configuration → Self-Service → Password Sync/Single Sign On → Add Application, and select ServiceDesk Plus from the applications displayed.
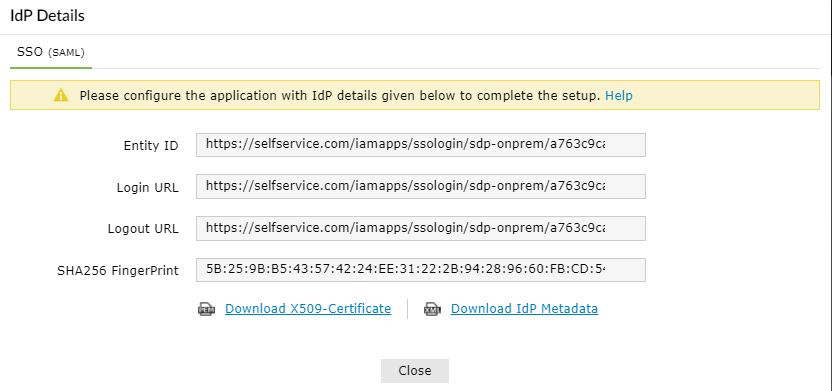
- Click IdP details in the top-right corner of the screen.
- In the pop-up that appears, copy the Login URL and Logout URL which will be used during ServiceDesk Plus configuration.
- Download the SSO certificate by clicking the Download X509-Certificate link.
ServiceDesk Plus (Service Provider) configuration steps
- Log in to ServiceDesk Plus with administrator credentials.
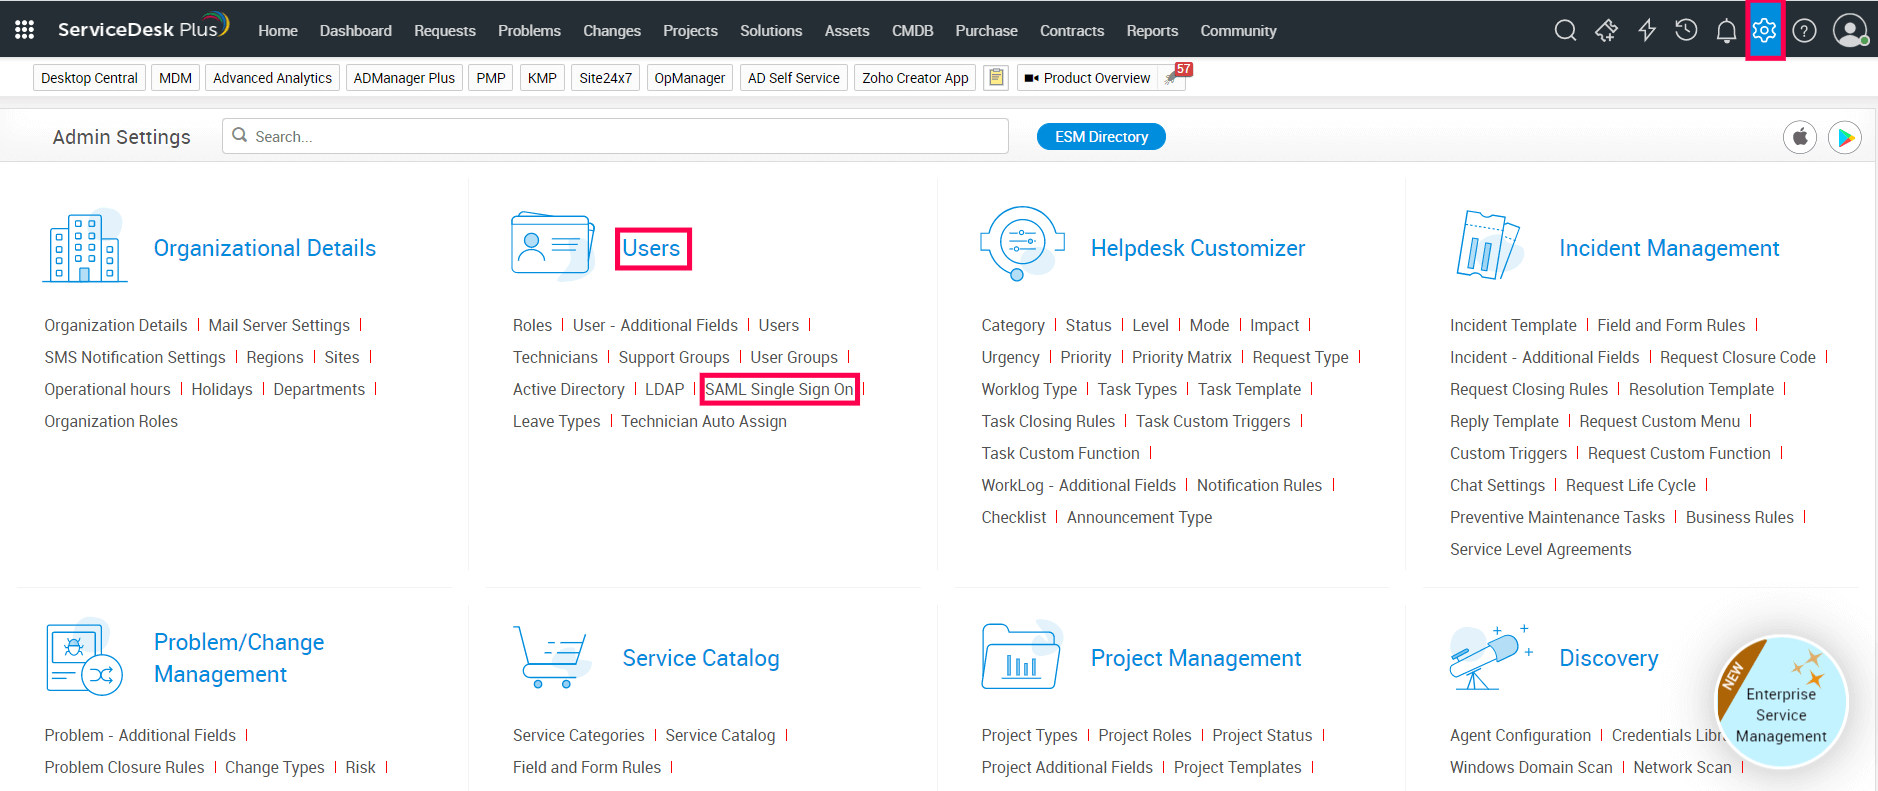
- Click on the Admin icon in the top-right corner.
- Navigate to Users → SAML Single Sign On.
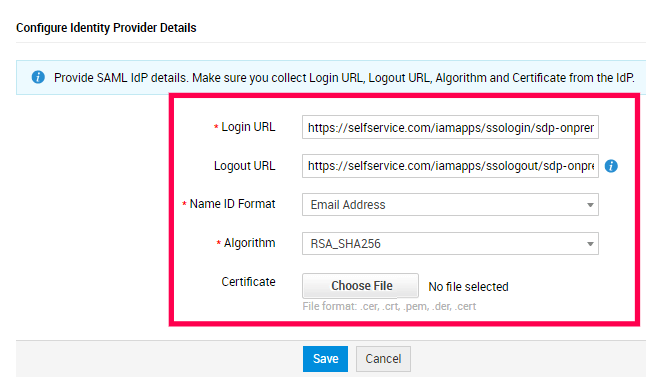
- Under the Configuration tab, navigate to the Configure Identity Provider Details section.
- In the Login URL field, paste the Login URL value copied in Step 5 of Prerequisite.
- In the Logout URL field, enter the Logout URL value copied in Step 5 of Prerequisite.
Note: The Logout URL is optional and can be skipped if single logout (Automatically logout from ADSelfService Plus when logging out from ServiceDesk Plus) is not required. It is mandatory that the Login URL and Logout URL values are valid domain names. For example, URLs in the following formats such as selfservice.com or selfservice.in are supported.
- In the Name ID format drop-down field, select email address from the list.
- In the Algorithm drop-down field, choose the option RSA_SHA256 from the list.
- Click on the Choose file button and select the file downloaded in Step 6 of Prerequisite to upload it.
- Click Save.
- After entering the identity provider details, toggle the button to enable SAML Single Sign-On.

- If you want users to log in to ServiceDesk Plus only through SAML Single Sign-On, toggle the button to enable Collapse the login form by default option. To allow users to choose between logging in with their credentials or SAML Single Sign-On, disable this option.
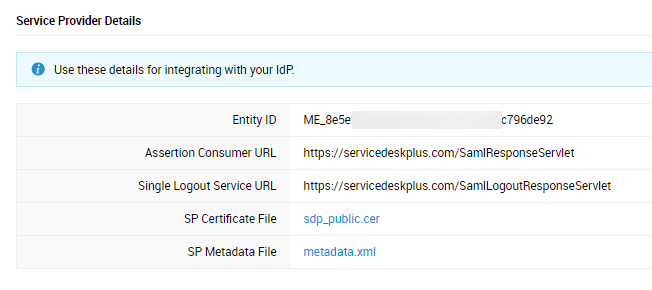
- Copy the values of Assertion Consumer URL and Entity ID from the Service Provider Details section which will be used later.
ADSelfService Plus (Identity Provider) configuration steps
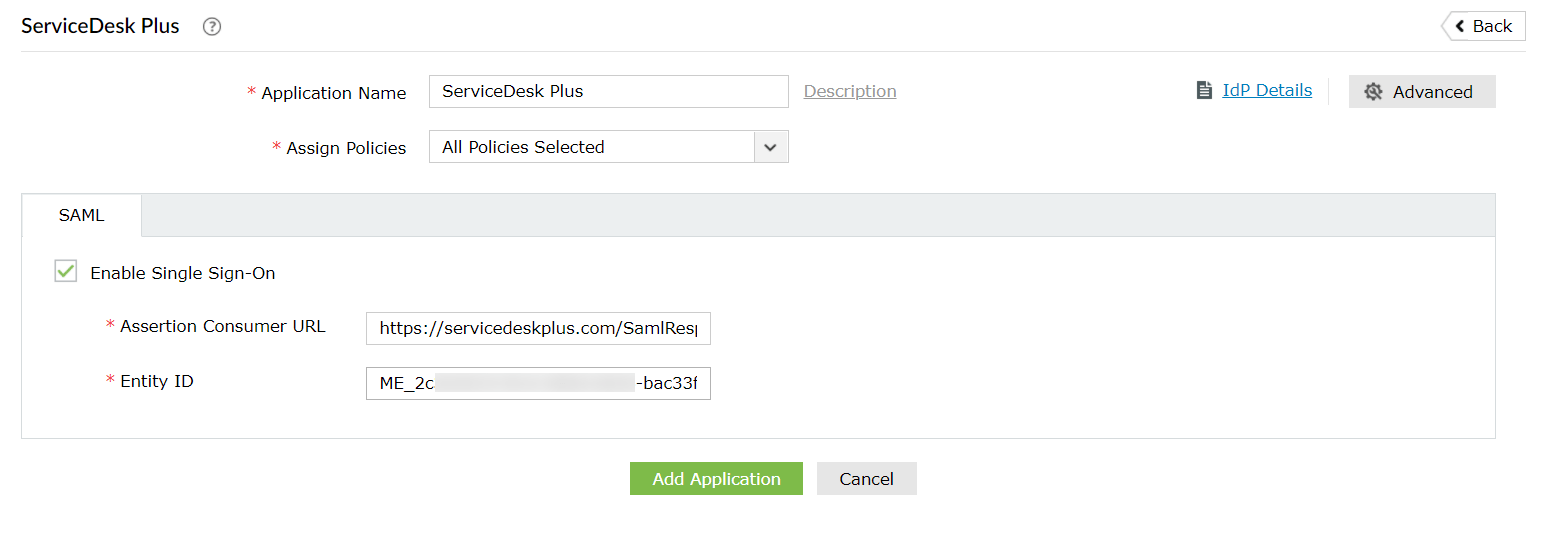
- Now, switch to the ADSelfService Plus' ServiceDesk Plus configuration page.
- Enter the Application Name and Description.
- In the Assign Policies field, select the policies for which SSO need to be enabled.
Note: ADSelfService Plus allows you to create OU and group-based policies for your AD domains. To create a policy, go to Configuration → Self-Service → Policy Configuration → Add New Policy.
- In the SAML section of the ServiceDesk Plus configuration page, select the Enable Single Sign-On checkbox.
- In the Assertion Consumer URL field, enter the Assertion Consumer URL copied in Step 13 of ServiceDesk Plus configuration.
- In the Entity ID field, enter the Entity ID value copied in Step 13 of ServiceDesk Plus configuration.
- Choose the Name ID format that has to be sent in the SAML response. The Name ID format will specify the type of value sent in the SAML response for user identity verification.
- Click Add Application.
Your users should now be able to sign in to ServiceDesk Plus through the ADSelfService Plus portal.
Note: For ServiceDesk Plus, both SP-initiated and IDP-initiated flow is supported.


